How to start a bullet journal when you’re not artistic (step-by-step method)
When it comes to planners, bullet journal is the buzzword these days.
If you are a Pinterest or Instagram user, you must have stumbled upon this term many times.
I did too and hopped onto the bandwagon a year ago.
I am an over thinker and a confused person (due to overthinking) and it overwhelms me sometimes (read all the time!). I definitely needed to unwind and put all the thoughts, tasks and to do lists into a place and relax!
That’s when I found out about the bullet journal system and fell in love with the idea.
I started soon and bought a notebook and supplies as “they” said.
I created colorful layouts and drew cute little pictures on the corners of the pages.
Did I keep up with it?
Noooo!
I kept up with planning in the bullet journal, but not the beautifying tasks.
I am not an artistic person or a doodler, though I am fascinated by the talents of many people. And I admire those beautiful layouts and wish I could do the same.
I could if I tried. But I found out it beats my purpose of keeping a bujo (that’s what a bullet journal is lovingly called).
What I want is to get things done and to jot down important points or events in my life so I can revisit them when I want.
I am not against embellishing the bullet journal. And I also draw weekly spreads which are different from the original bullet journal system. And I do use some supplies to add some color. Because I find it easier to sort through my writing if I want to come back to it later. Sometimes I use sticky notes or bookmarks inside the journal because it is more convenient for me.
But all these are not necessary.
So here I wanna talk about how to start a simple bullet journal, the maintenance of which is not overwhelming. It is completely okay even if you are not artistic.
**This post contains affiliate links. I may receive a small commission at no extra cost to you if you make a purchase through my affiliate link**
Bullet journal supplies for beginners
What you need to start a bullet journal: A notebook and a pen.
If you ask which notebook to buy for a bullet journal, I would say, it depends on your budget and necessities. If you want to keep your completed journals with you for a long time, better opt for a good quality one.
The most preferred notebook for a bullet journal is Leuchtturm 1917. It is the book endorsed by the creator of bullet journal, Ryder Carroll. And the company has an official Leuchtturm notebook for bullet journal.
Other popular notebooks in the bullet journal community are:
· Lemome
· Rhodia
You will get these books in different sizes like A4, A5, and A6. The most preferred size is A5 as it is neither big nor small and convenient to fit in your bag and easy to carry around.
You can choose between ruled, dotted or blank notebooks. My first bullet journal was a blank page notebook. Now I use a dotted one and I find it very useful when I need to draw lines or tables.
If you become a regular user of bullet journal, you might find it useful to carry it with you wherever you go (not a necessity, but I do sometimes if I am gone for a long time). So a quality notebook is a good bargain. If you want to use cheaper supplies to start bullet journaling including notebooks, read this article: 13 cheap bullet journal supplies you can buy for under $12
do I need to be artistic to Start a bullet journal?
If you have the belief that you need to be creative or artistic to start a bullet journal, you are wrong. Bullet journaling is more about increasing productivity and getting organized, hence it is okay if you aren’t creative. Let’s see what all do you need to start.
Related: 10 bullet journal tips you must know as a beginner
The pages you need
The following are the pages you need to start a bullet journal.
1. Index
2. Key
3. Future log
4. Monthly log
5. Weekly log/Daily log
6. Collections
Index
Bullet journal is a very flexible system that you can tweak to your needs. Its possibilities are endless and it becomes what you want.
The beauty of a bullet journal is you can write in it whenever you want. Even if you don’t write on some days you don’t have to leave the pages blank, unlike other planners.
So you definitely need an index to keep tabs on the pages you write.
Leave the first four pages (that fall side by side) for the index.
(The official bullet journal notebook features numbered pages, an index, a bullet key and 3 bookmarks).
Write “Index” on top of it.
Now if you are not using a numbered notebook you number each page as you go.
When using a bullet journal it is better to get used to writing each page’s topic (heading) and page number first. And immediately add it to the index before making an entry.
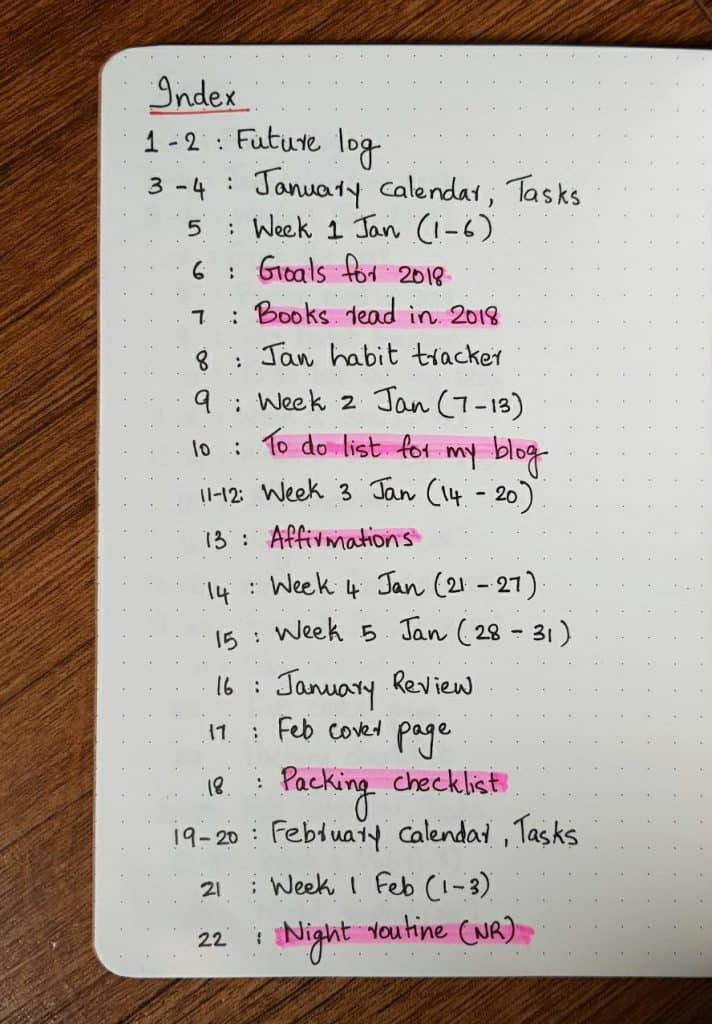
I highlight some topics in the index ( I use highlighter pens or brush pens for this). Those are my collections. It helps me to find the collection I need to find easily (more on collections in a minute).
Future log
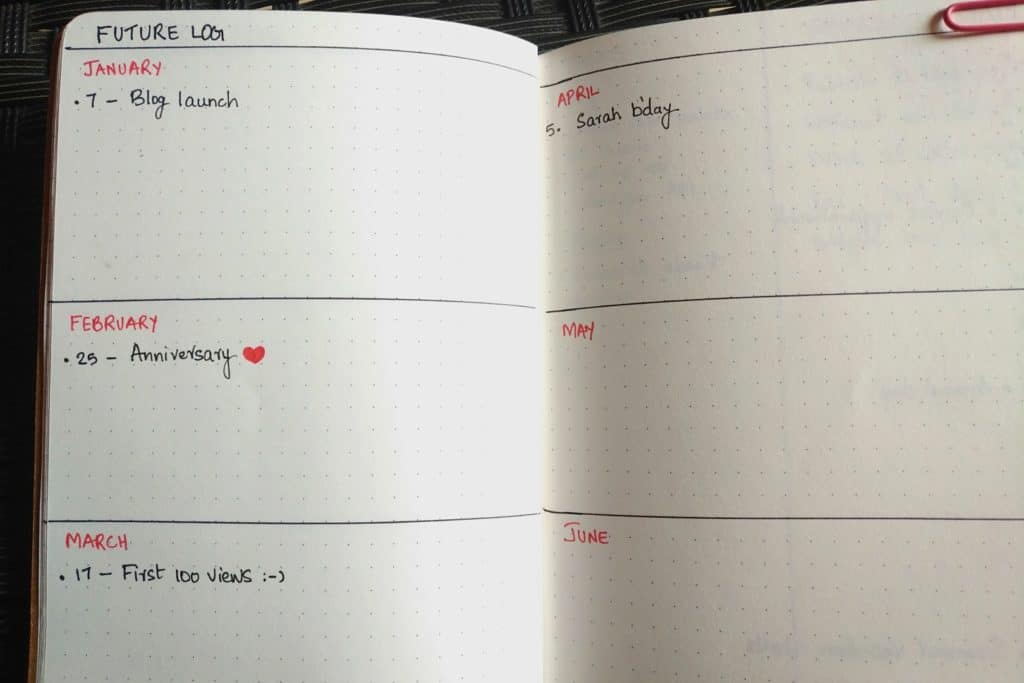
You can use the next two pages for the future log. Write “Future log” on top of the page.
A future log is a place to write down your events, tasks, and goals for the next six months. It helps to have a quick glance at the upcoming events in the future log.
Divide each page into 3 equal parts by drawing horizontal lines. Write down the names of the months in each column. Add your entries.
You can note down birthdays, anniversaries, meetings, vacation trips etc.
I also have a page called “Year at a glance” to note down the past events which are important for me.
Like the day I went on some trip, the day I visited someone, milestones of my kids or career etc.
Monthly log
Next, we create the monthly log. Take two pages that fall side by side. One page is for calendar and the second one for monthly tasks.
Write the name of the month on top of the first page. Write the days of the month (1, 2, 3….30/31) downwards. You can write the starting letter of the corresponding day of the week next to each date, like in the picture.
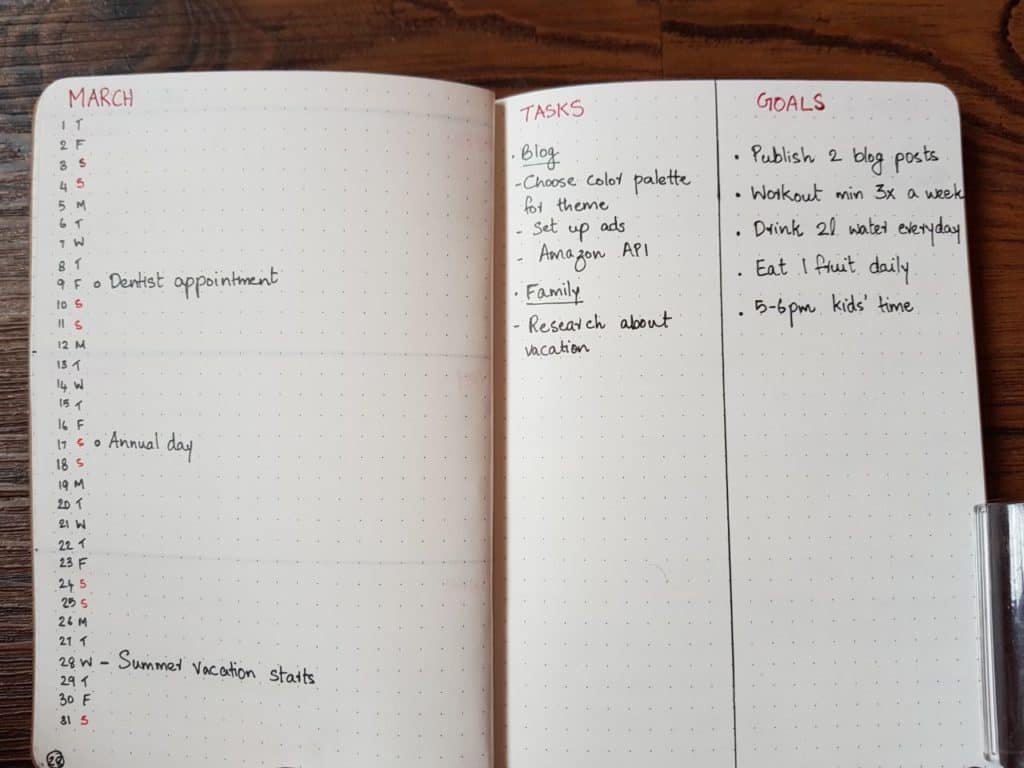
Now you can write the month’s events and appointments corresponding to each date in the calendar page.
The second page is for monthly tasks and goals. You can draw two columns with headings ‘Tasks’ and ‘Goals’. This is where you write what you want to achieve that particular month.
I write my goals in all areas here. Like relationship goals, goals for my blog, spiritual goals, health goals, parenting goals, self-care etc.
It gives an idea of how my month is going to be (or should be).
After each month I do a monthly review and evaluate how much I did accomplish. And set new goals for the next month and migrate tasks (if any) to the next month.
Weekly log/ Daily log
The original bullet journal by Ryder Carroll doesn’t have a weekly log. But a lot of bullet journal enthusiasts have it. It depends upon your needs. If you have a lot of tasks, meetings, and appointments to take care of, you need a daily log.
You can also have both logs if you have a busy week. Write the important tasks in advance in a weekly log, and elaborate all the mini-tasks that come under each important task in the daily log. If you are using both logs, you can do a “brain dump” by writing all the events in advance in the weekly log. And each day you can expand each task in the daily log. This way, you don’t miss anything.
If your days are mostly the same or if you don’t want to enter every task you do into a bullet journal you can go for a weekly log.
I mean, come on, you do many of the chores out of habit. You don’t need a reminder for every task.
On some weeks, I use only weekly logs. But sometimes, I make daily logs as well.
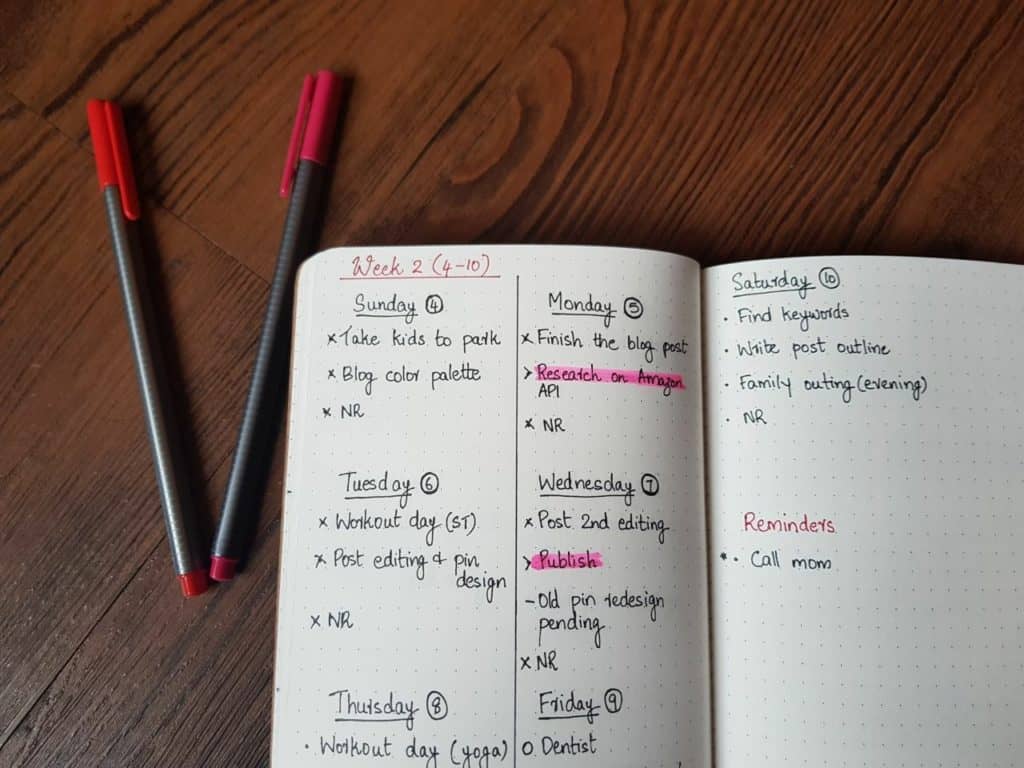
I usually draw a weekly spread in advance between every Friday and Saturday. I write down all those tasks that need to be done on specific days and additional tasks if any, goes to the spread each day.
It helps me to dump my thoughts “off my head” and visualize my week in advance.
I usually plan the night before. But even then, weekly spreads are enough for me to write down the tasks. This is an example of a weekly log.
In a daily log, you write each day’s tasks as you go. If you have to juggle lots of things at home and work, you can plan accordingly in your journal. You can separate work and personal/home into two columns and add respective entries.
To create a daily log, take a fresh page and write down the date as the heading, and add your entries.
The daily log gives you the freedom to take more space if you want, for busier days. If you do not record daily it’s better if you keep a daily log rather than a weekly log, as you will be leaving blank spaces in the weekly log. Here is an example of a daily log from tinyrayofsunshine.com
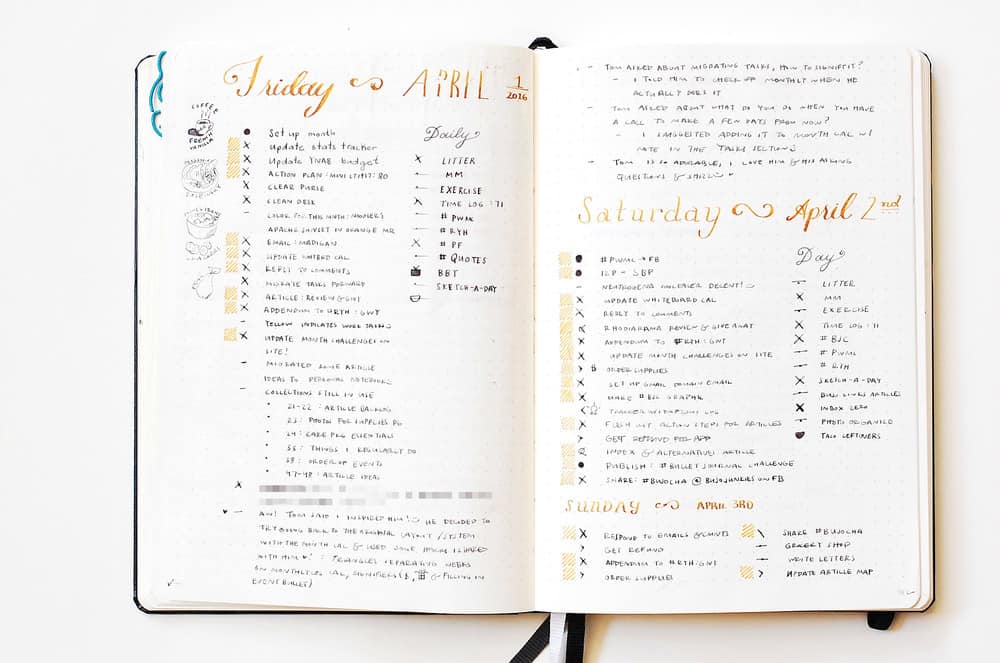
It is okay even if you don’t record in your journal daily. You can pick back up where you left off without feeling guilty of leaving blank pages.
That’s why people love bullet journal, because of the flexibility it offers.
Related: Why weekly planning is a surefire way to increase productivity
Now you need to know how to make entries so that it’s easier to identify different tasks.
Let me walk you through the language and elements of a bullet journal. Hope you are still with me.
Rapid logging: The language of a bullet journal
Unlike traditional planning systems or diaries, you don’t need to write elaborate sentences in a bullet journal. It takes time and a bullet journal is here to make journaling easier.
Rapid logging consists of 4 components:
Topics, page numbers, short sentences, and bullets. (Source: bulletjournal.com)
- Topics– The heading of each page. With each fresh page, you give a heading so that you are clear what it is about. Example: Future log, Monday 12th March, Index etc.
- Page numbers– As soon as you give a page a heading you mark it in the index with the page number. It can be a hassle to number each page later and add it to the index. (Believe me, I have done that).
- Short sentences & Bullets- You need to write only short phrases for each entry. Example: laundry, workout, order the book.
You can use abbreviations to represent the tasks you do often.
Example: ST for strength training, NR for night routine
Bullets are used to make each entry.
Depending upon the nature of each entry, 3 types of bullets are used.
- for tasks
O for events
– for notes
And depending upon the completion of tasks, there are additional bullets used like,
X for task completed
> task migrated
< scheduled task
Signifiers
Signifiers are symbols which add extra information to a bullet. Commonly used signifiers are,
* shows task’s priority
! inspiration (for ideas and insights)
“Eye symbol” for explore (a reminder for topics you need to research more)
Example: *• Send the email to John
! You compete only with who you were yesterday
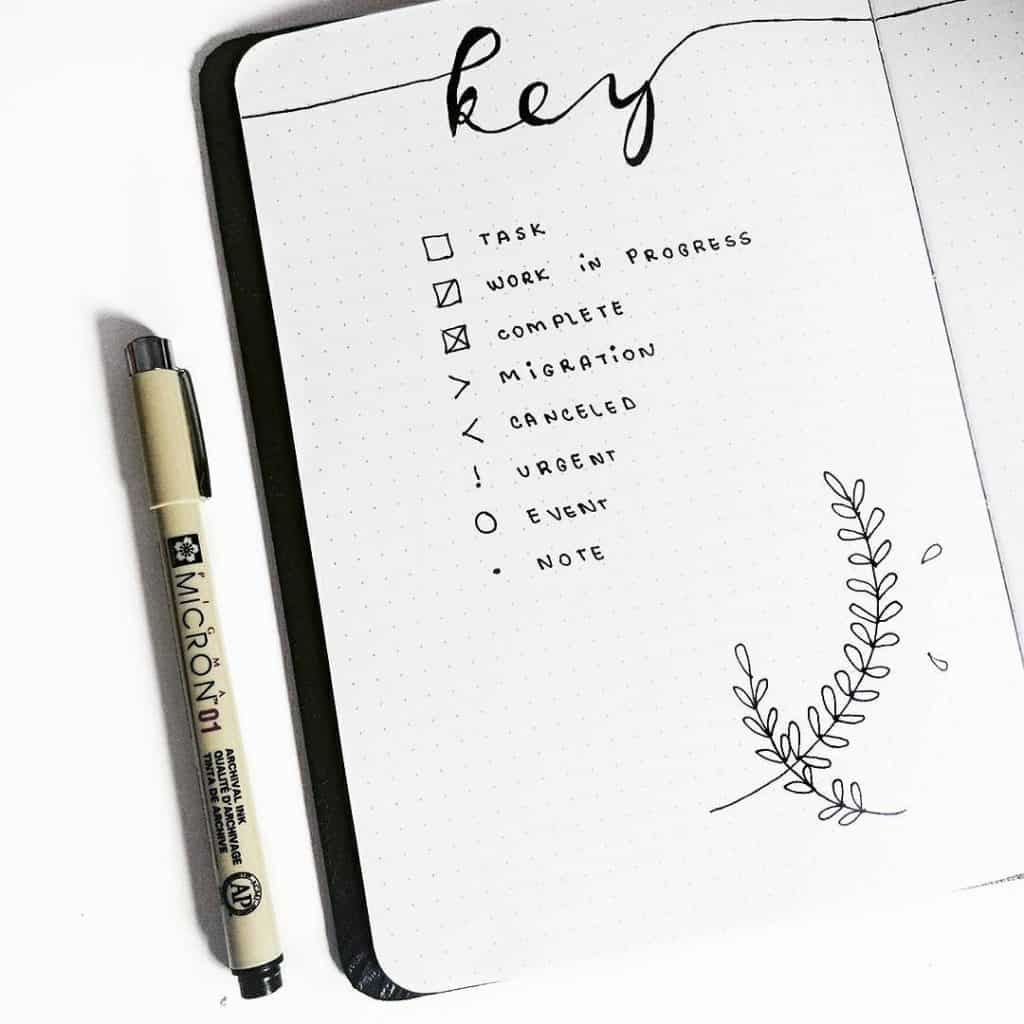
But these bullets are not set in stone. It means you can use the symbols that are easy for you. Some people use squares to denote tasks, and color the squares to indicate completed tasks. Again, it’s your choice.
You can create a page called ‘Key’ in the beginning to help you remember the bullets. As I use only 3 or 4 bullets, I have not created this page.
Here is an example of ‘Key’ page from @letsgojournal.
Task Migration
According to Ryder Carroll, migration is the cornerstone of bullet journaling.
Migration means, reviewing unfinished tasks each month and move them to the next month. You note it down in the tasks page of the monthly log at the beginning of each month.
But monthly migration doesn’t suit me. I do it every other day because some tasks cannot wait for a month. I highlight the task with my brush pen (you can also use the bullet >) so that it stands out.
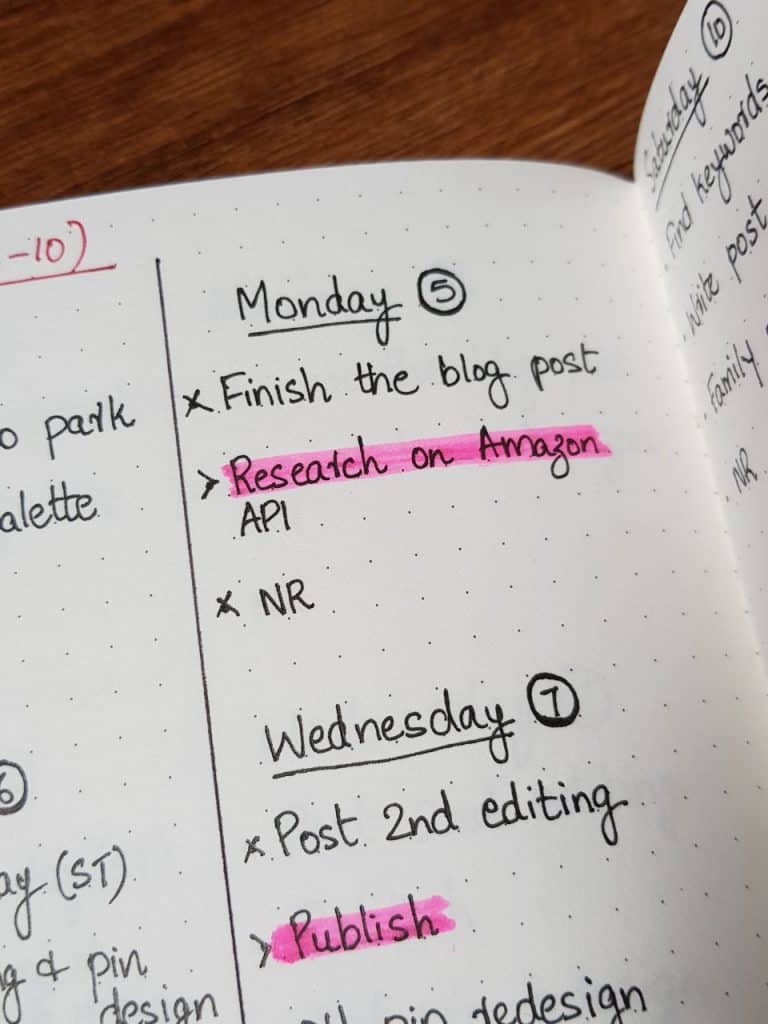
But if I migrate some tasks repeatedly, I don’t see the need to do it anymore. In that case, I cross it off. That’s another benefit of bullet journaling. It causes you to reflect on what is important and what you should give your time to. If you are postponing repeatedly, it might not be worth your time. Or think about delegating.
Collections
Collections in a bullet journal pretty much talk about your life. It gives the journal a touch of your personality.
Collections are pages dedicated to specific topics.
Example: Meal Planning, Grocery list, Habit trackers etc.
To start a collection, you take the next fresh page, write the topic, add the page number to your index, and start writing.
Some collections in my bullet journal are:
· My bucket list
· Packing checklist (Thanks to this, I don’t miss a thing in my travels now. Also, I don’t have to think before packing)
· Gratitude log
· Uncomfortable things I did (My goal for this year is to get out of my comfort zone as much as possible and do the things I fear. I note down such acts in this collection to boost my confidence and for future inspiration).
· Goals for 2018
· Inspirational quotes
· Affirmations
· Self-care log
· My vision board
You see, starting a bullet journal was one of the best decisions in my life. Now I have a place to dump my thoughts and free myself. You should do it too!
Related: The ultimate list of bullet journal collections(121+ideas)
Now that you know what collections are, you need to know about threading too.
Threading
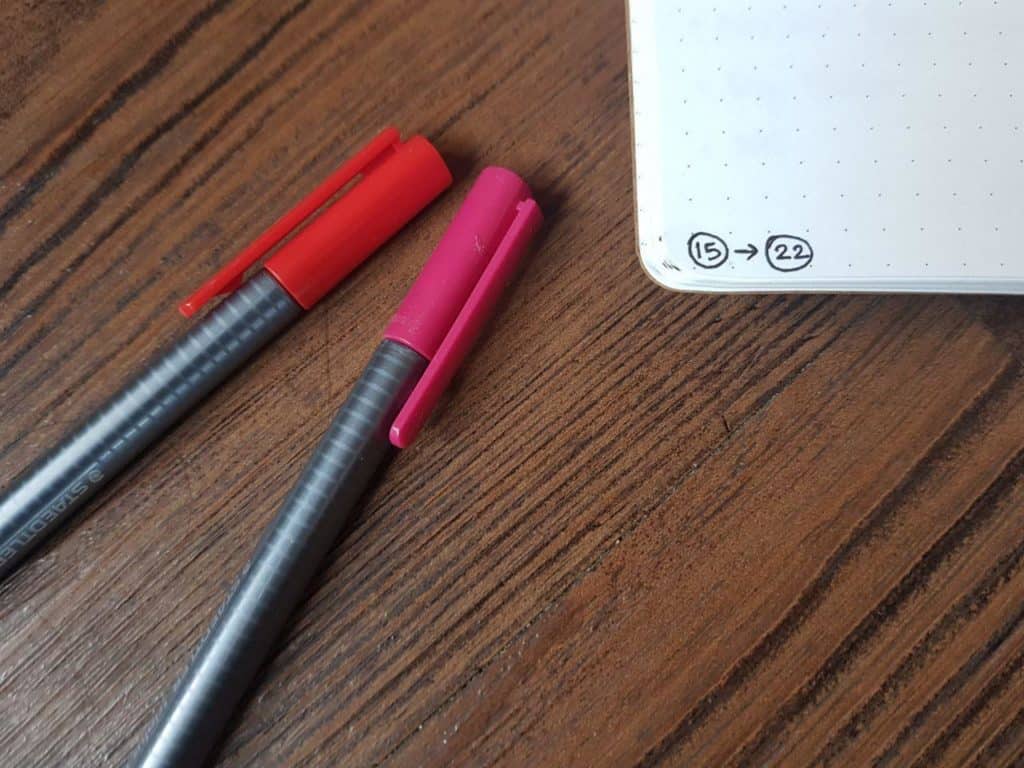
Threading is a method used to connect pages of similar topics together. In a bullet journal, we fill in the pages as we go. For example, if you have a collection called ‘Project notes’, and your notes lie on page 20, and the continuation is in 25, you can make use of threading. Simply add 25 to 20 and vice versa.
Conclusion
Starting a bullet journal is easy. It need not overwhelm you if you keep it simple. It increases your productivity and helps you plan and organize your life.
You have enough information to start a bullet journal(with no artistic skills) in this post. If you have any questions or comments please let me know below. Happy to help!
If you love what you are reading, please take a moment to PIN and SHARE!






I love a good journal. Great tips.
Thank you Elise 🙂
Hi..Thank you Waheeda !!! A friend had gifted me a nice notebook and I so wanted to start a bullet journal but I was overwhelmed with the creative stuff that you see on Instagram and pintrest. Reading your post was really helpful. I am starting the journal from tomorrow. Your post was an inspiration… Thank you so much !!!
Hi Anagha,
I am glad my post could help you. The creative stuff of a bullet journal is what stops many people from starting it. It can also beat the actual purpose of starting a bullet journal, which is personal productivity.
Keep up with it and let me know how it goes 🙂
This page was so helpful! I’ve been looking at a bunch of Bullet Journal spreads, layouts, tips, etc but nothing really gave me the info I was looking for, how to functionally use the journal, which spreads should come before others, etc. And this page has all that info and more! Also, the concept of threading is super helpful for understanding how to have everything flow in a way that makes sense. And the whole “go day by day rather than fill out an entire week and have white space wasted every week” is a huge problem solver for me. Thanks a bunch!
I am happy it helped you 🙂